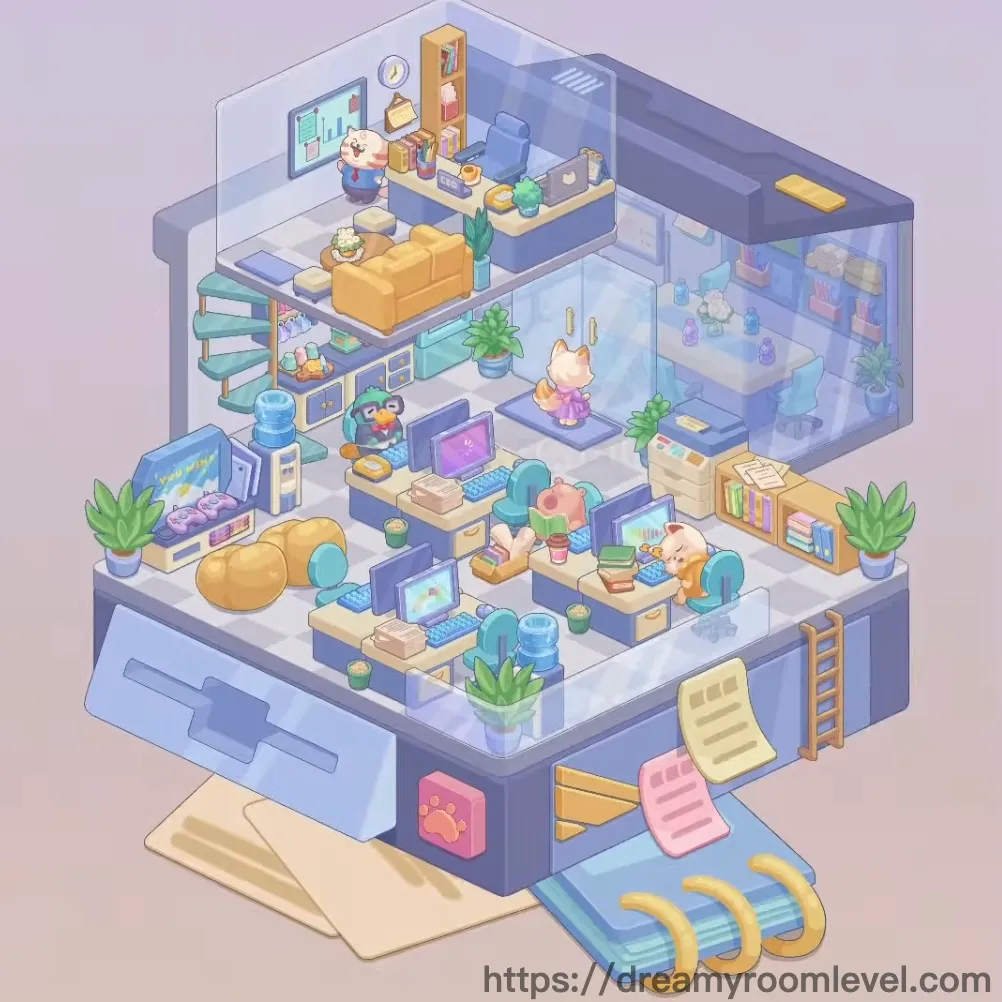
Dreamy Room Level 499
Level 499 guide walkthrough, helping players solve puzzles and explore the wonderful world of Dreamy Room.
Dreamy Room Level 499 Walkthrough Guide
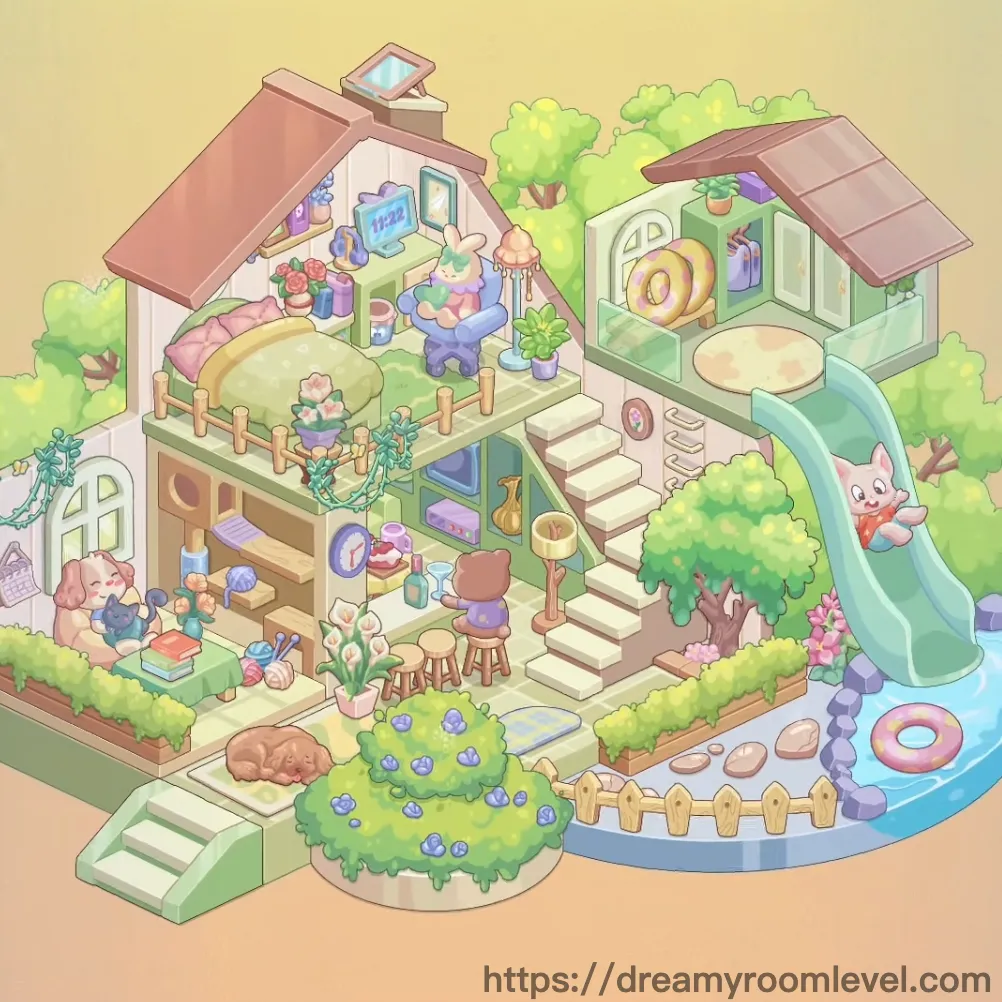
Dreamy Room Level 499 Room Story
In a charming cottage nestled among blooming gardens, a creative artist has found her perfect sanctuary. The multi-level home features a cozy workspace adorned with yarn and crafts on the lower floor, while the peaceful bedroom above overlooks the garden through skylights. Outside, a playful slide leads to a sparkling pool where colorful swimming rings float lazily. This is Dreamy Room Level 499, where every corner tells a story of creativity, comfort, and joyful living with her faithful sleeping dog companion.
Dreamy Room Level 499: Step-by-Step Placement Guide
Step 1. Install Roof Window and Chimney Structure
Place the roof window on the upper left rooftop, aligned with the bedroom's ceiling. Position the roof chimney on the left roof edge. Following Dreamy Room Level 499 design, these elements bring natural light and ventilation to the cozy space.
Step 2. Complete Roof Tile Coverage
Drag the roof tile pieces across the entire rooftop surface, ensuring they overlap correctly on both the left and right sections of the house. This placement is essential for Dreamy Room Level 499's charming cottage exterior.
Step 3. Hang Star Lights in Upper Bedroom
Position the hanging star lights along the ceiling of the upper bedroom area, creating a magical ambiance. Place the small window frame on the bedroom's left wall for additional lighting.
Step 4. Set Up the Bed with Complete Bedding
Place the bed mattress in the upper bedroom's center, then layer the bed blanket and bed pillow on top. Add the bedside fence along the bed's open side. According to Dreamy Room Level 499 layout, this creates a safe and comfortable sleeping area.
Step 5. Add Bedroom Decorative Elements
Place the flower pillow on the bed surface. Position the round night lamp on the left bedside area, and set the digital clock on the upper shelf displaying the time.
Step 6. Install Upper Wall Shelf and Personal Items
Mount the wall shelf on the bedroom's back wall. Place the perfume bottle, blue bag, and purple bag on this shelf. Completing Dreamy Room Level 499 bedroom requires attention to these personal touches.
Step 7. Position Bedroom Plants and Plush Toy
Set the houseplant pot near the bedroom window area. Place the adorable rabbit plush on the bed or nearby surface, adding warmth to the space.
Step 8. Arrange Blue Rocking Chair Area in Dreamy Room Level 499
Position the blue rocking chair on the upper terrace area beside the bedroom. Place the side table next to it with a small potted plant on top for a relaxing reading corner.
Step 9. Add Climbing Flower Vine Decoration
Drape the flower vine along the stairway railing and ceiling beam, connecting the upper and lower floors with natural beauty. This element is crucial for Dreamy Room Level 499's cohesive design.
Step 10. Install Stairway Components
Position the stair rail along the staircase's left side. Place all stair steps in sequence connecting the ground floor to the upper bedroom level, ensuring proper alignment for safe passage.
Step 11. Set Up Cat Tower and Lighting
Place the cat tower post on the middle level near the stairs. Install the ceiling lamp hanging from the ceiling beam above the middle floor workspace.
Step 12. Install Mirror and Storage Cabinet in Dreamy Room Level 499
Mount the oval mirror on the middle level's back wall. Position the cabinet shelf below it with glass cup and bottle jar neatly arranged on the shelves.
Step 13. Arrange Workspace Seating
Place the stool chair and brown chair around the middle level workspace. According to Dreamy Room Level 499 requirements, ensure they face the work area for comfortable crafting sessions.
Step 14. Position Knitting Supplies and Materials
Set the knitting basket on the floor near the workspace. Place yarn balls and yarn needles inside the basket and scattered nearby, showing an active crafting project.
Step 15. Add Books and Workspace Table
Stack the books stack on the ground floor's left side. Position the desk table in the workspace area for crafting activities in Dreamy Room Level 499.
Step 16. Place Plush Toys Collection
Position the dog plush and cat plush on the ground floor shelves or workspace area, adding playful charm to the creative space.
Step 17. Position Sleeping Dog on Ground Floor
Place the adorable sleeping dog on the floor mat at the ground level entrance, creating a warm welcome area. This placement is essential for Dreamy Room Level 499's homey atmosphere.
Step 18. Create Outdoor Garden with Flower Pots
Position multiple flower pot pieces around the outdoor garden area. Plant the bush elements in the garden's middle section for lush greenery.
Step 19. Plant Large and Small Trees in Dreamy Room Level 499
Place the tree big in the upper garden area behind the house. Position the tree small in the lower garden section, creating layered natural scenery.
Step 20. Install Garden Fence and Pathway
Position the fence wood along the garden's lower boundary. Place the round stepping stones creating a curved pathway through the garden space.
Step 21. Set Up Pool Slide and Toy
Install the slide on the right side of the garden, with its base near the pool area. Place the cute fox plush on slide riding down for a playful touch in Dreamy Room Level 499.
Step 22. Create Pool Water Feature
Position the pool water surface in the lower right corner of the garden. Float the swimming ring on the water surface, adding vibrant colors to the pool area.
Step 23. Place Interior Floor Rugs
Position the round carpet on the ground floor workspace area. Place the round rug under the furniture on the middle level, according to Dreamy Room Level 499 design principles.
Step 24. Install Closet and Hanging Storage in Dreamy Room Level 499
Mount the closet cabinet on the right side of the middle level with the green door facing forward. Hang the clothes hanger inside the closet with garments displayed.
Step 25. Add Pretzel Decoration and Ceiling Beam
Place the decorative pretzel decoration on the upper right closet area as a unique accent piece. Ensure the ceiling beam is properly positioned supporting the upper floor structure.
Step 26. Install Window Arch Structure
Position the window arch on the right side green section of the house, creating an elegant architectural detail. This placement is essential for Dreamy Room Level 499's charming cottage appearance.
Step 27. Arrange Outdoor Potted Flower Bush
Place the potted flower bush in the garden's left section near the entrance, adding colorful blooms to the outdoor space.
Step 28. Lay Ground Tiles and Porch Flooring
Install the side walkway tiles along the garden pathways. Place the ground tile pattern on the lower floor interior. Position the wooden porch at the entrance area.
Step 29. Add Front Garden Flowers in Dreamy Room Level 499
Plant the flower bushes in front of the house entrance. Scatter garden flowers throughout the outdoor space, and position the flower tree in the upper garden area.
Step 30. Install Stair Mat and Entrance Door
Place the blue stair mat on the stairway steps for safety and color. Install the wooden door at the ground floor entrance, following Dreamy Room Level 499 layout requirements.
Step 31. Add Wooden Handrail and Final Details
Position the wooden handrail along the stairs and upper terrace edges for safety. Place the lamp stand in the lower floor area and add the purple shelf decor on the ground floor shelves.
Tips and Tricks
Tips
- Start with the roof structure and work downward to avoid accidentally covering placed items in Dreamy Room Level 499
- The bedroom area requires careful placement due to the sloped ceiling and limited space around the bed
- Pay special attention to the stairway connections between floors, ensuring railings and steps align properly
- The garden area has multiple small flower pots that are easy to overlook behind larger bushes and trees
- The closet cabinet's door orientation is crucial; it must face forward to properly display the hanging clothes
- Watch for hidden placement spots under the slide and behind the pool area where stepping stones should be positioned
Tricks
- When placing the flower vine, start from the top and let it naturally drape down the stairway for realistic appearance
- The yarn balls and needles can be slightly scattered to create a lived-in crafting atmosphere rather than perfectly aligned
- Position the sleeping dog on the floor mat first, then adjust the mat's placement for optimal entrance positioning
- Use the ceiling beam as a reference point when aligning the hanging star lights and ceiling lamp in Dreamy Room Level 499
- The pool water surface has a specific curved shape; align it with the fence corner before placing the swimming ring
- Place larger trees before smaller bushes to easily identify remaining gaps in the garden layout
- The round stepping stones create a natural S-curve path; follow the ground pattern's flow for perfect placement